phpstorm xdebug 调试
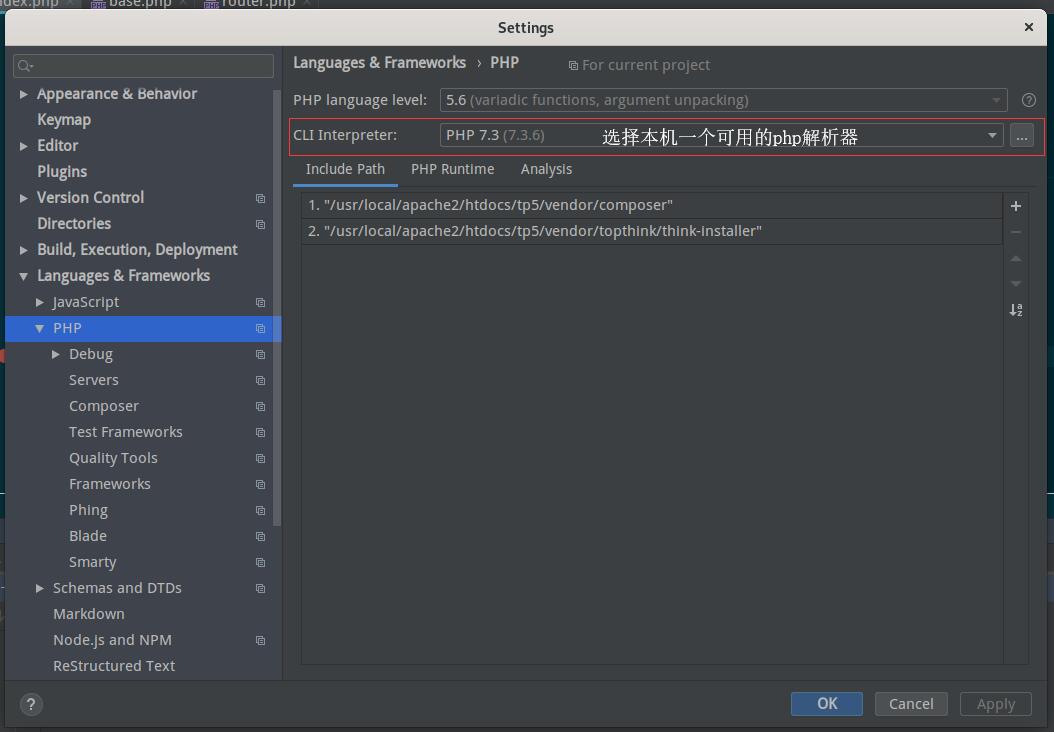
1、安装LAMP
首先需要安装php(含xdebug模块), apache(nginx)。这部分按官网说明安装就可以。
php安装
xdebug安装 https://xdebug.org/docs/install 可以使用pecl的方式安装,比较简单。
调整xdebug的部分参数
打开php.ini文件,增加下面两个配置
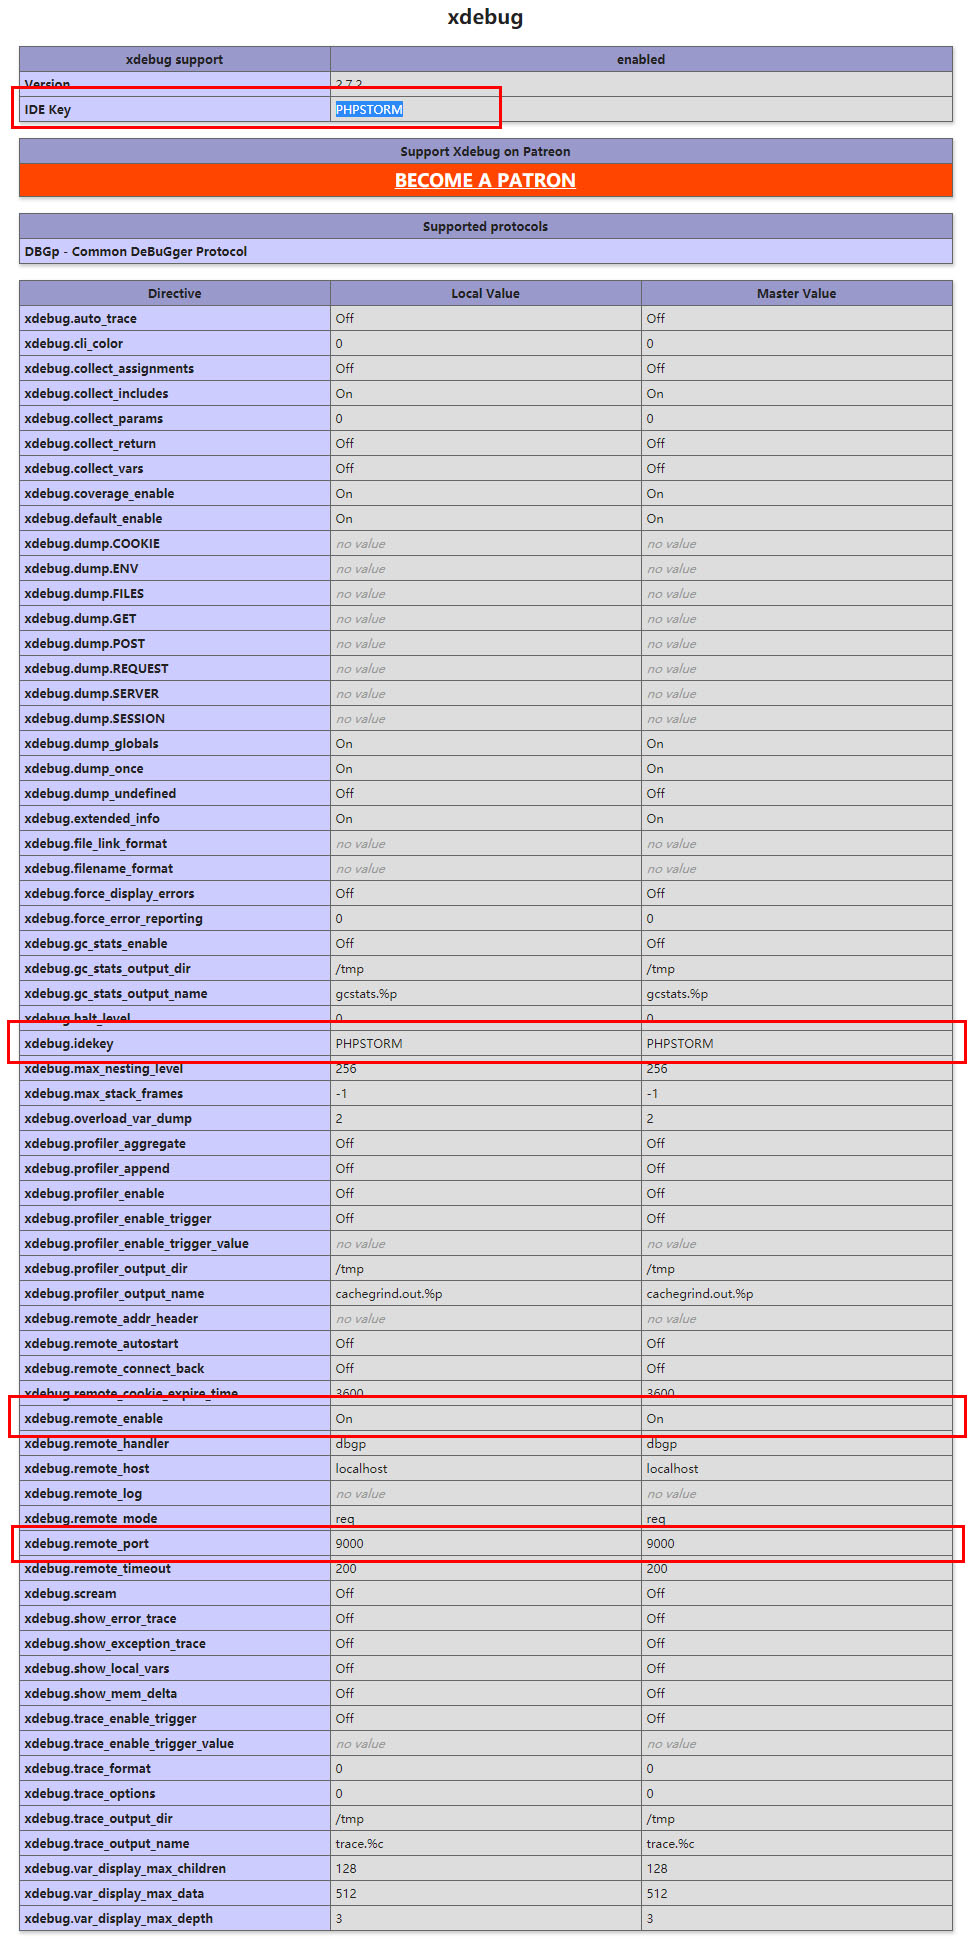
xdebug.idekey=PHPSTORM
xdebug.remote_enable=ON
检查是否正常安装
打开页面phpinfo.php
<?php
    phpinfo();
?>
配置PhpStorm
配置settings
打开 File -> Settings -> PHP
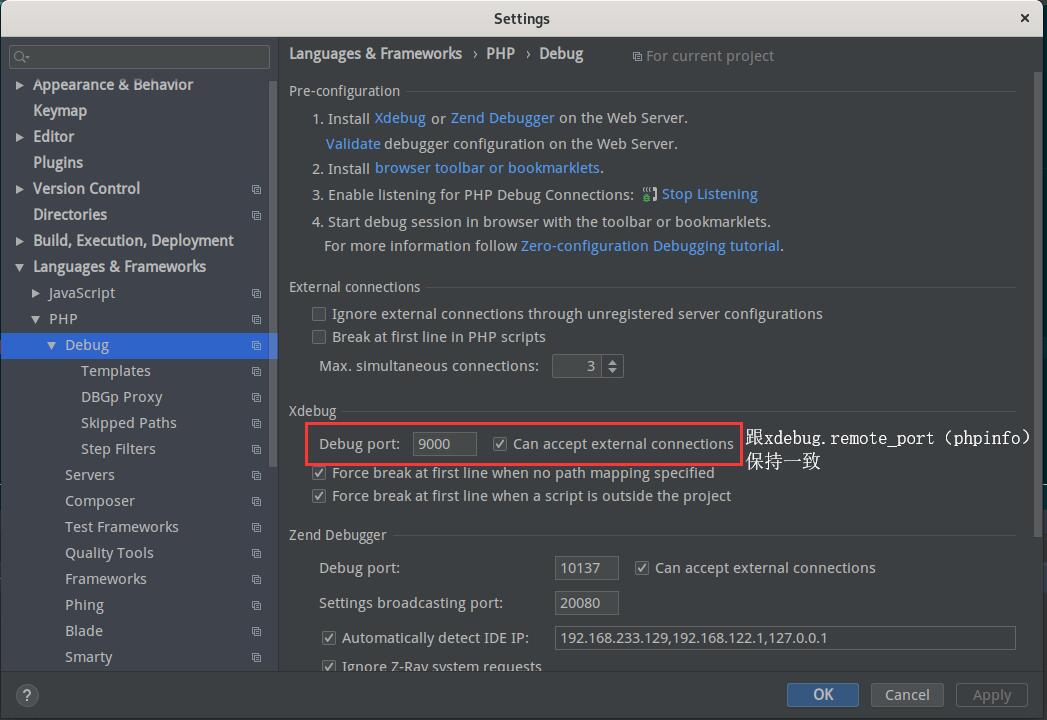
打开 File -> Settings -> PHP -> Debug
确认debug port跟phpinfo -> xdebug.remote_port 一致
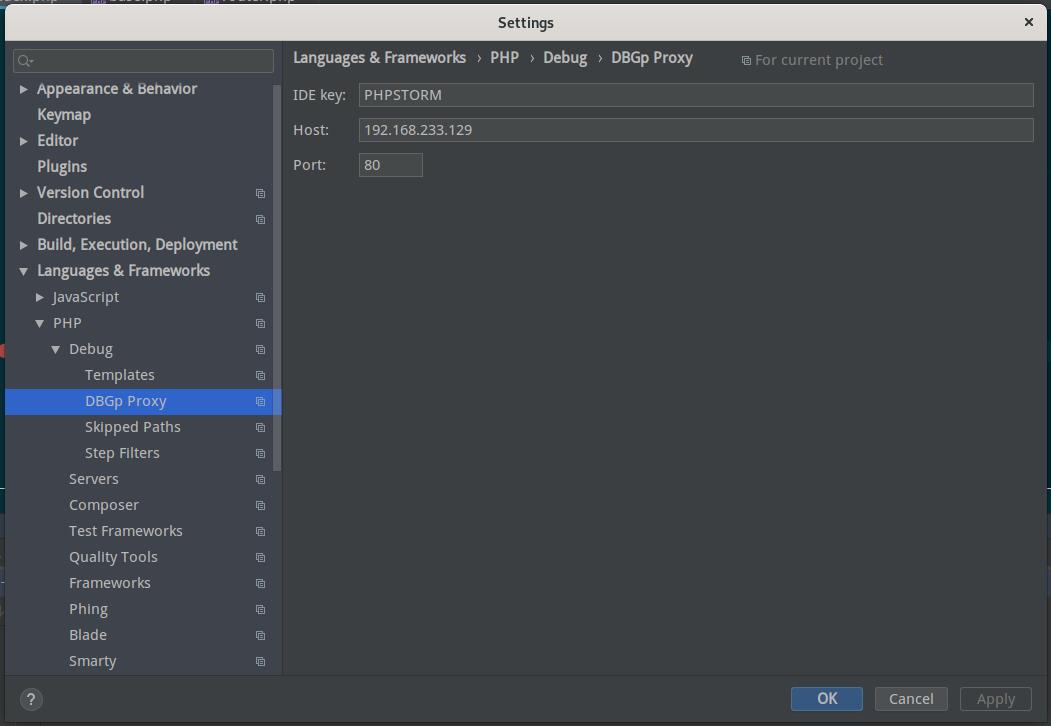
打开 File -> Settings -> PHP -> Debug -> DBGp
Proxy
填入Apache站点的信息
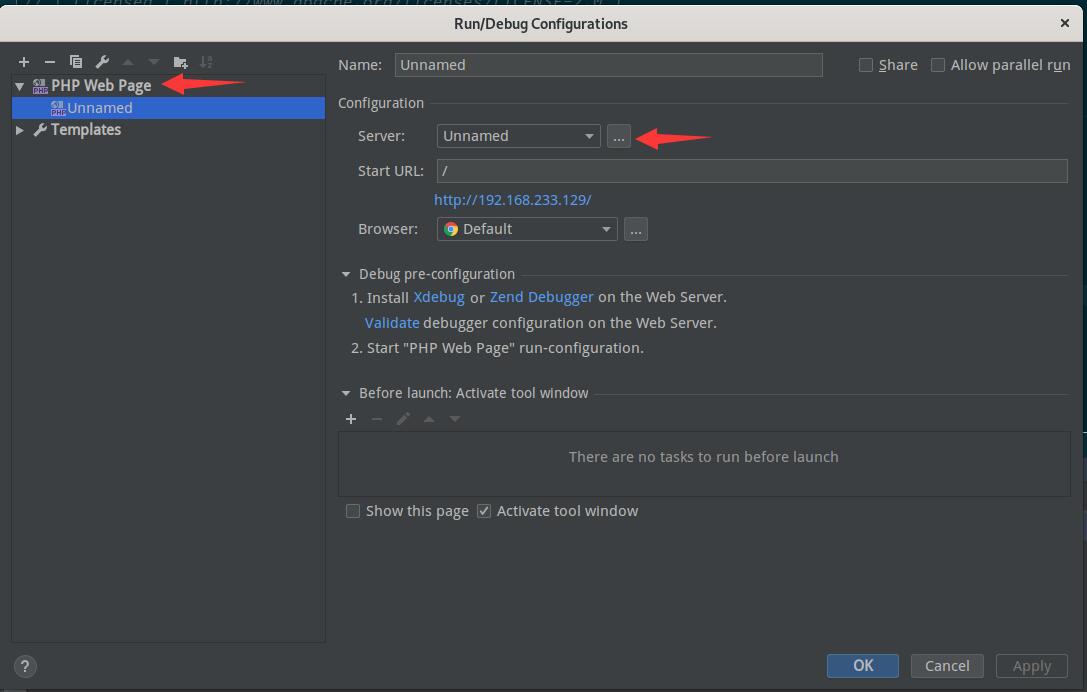
配置 Debug Configurations
打开 Run -> Edit Configurations
添加 PHP WEB
Page
开始调试
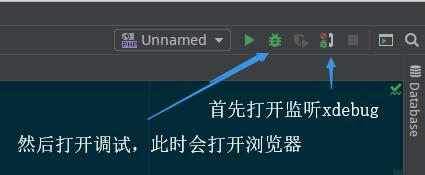
此时phpstrom会打开浏览器,类似这样的网址
http://192.168.233.129/tp5/public/?XDEBUG_SESSION_START=18718 请留意这段尾巴
XDEBUG_SESSION_START=18718 ,你可以改成 XDEBUG_SESSION_START=PHPSTORM,
效果是一样,其中PHPSTORM就是那个idekey。
只需要在访问页面的时候加上XDEBUG_SESSION_START=PHPSTORM,phpstorm的断点就会生效了。
可能你也注意到了,你的软件要放在apache下面,首要条件是他得能通过浏览器访问。
版权声明:如无特别声明,本文版权归 一年四季 所有,转载请注明本文链接。
(采用 CC BY-NC-SA 4.0 许可协议进行授权)
本文标题:《 phpstorm xdebug 调试 》
本文链接:https://www.yucanlin.cn/develop/phpstrom-xdebug-%E8%B0%83%E8%AF%95.html
